Local TV Aerials & Satellite Services

Local TV Aerials & Satellite Services

LTV - big enough to cope, small enough to care

Where Is the Best Place to Install a Starlink Dish?

best-place-starlink-dish
Starlink can provide a useful broadband option for homes and businesses in areas where conventional broadband is slow, unreliable or unavailable. However, buying the equipment is only part of the process. The position of the Starlink dish can make a significant difference to the reliability of the connection. A convenient installation position is not necessarily the best one. Before mounting the dish permanently, it is important to consider its view of the sky, nearby trees and buildings, the cable route into the property and whether the mounting position will remain safe and secure in bad weather.
Professional Starlink dish installation at a rural property
A professionally installed Starlink dish with a clear view of the sky.

Why Does a Starlink Dish Need a Clear View of the Sky?

Unlike a traditional satellite television dish, which points towards a fixed satellite, Starlink communicates with a network of satellites moving across the sky. The dish therefore needs a wide and reasonably clear field of view. Trees, branches, chimneys, roofs, poles and nearby buildings can interrupt the connection between the dish and the satellites. Even if the dish appears to be pointing into an open area, something positioned around the edge of its field of view may still cause intermittent interruptions. This is particularly important for people who use their connection for:
  • Video calls and online meetings
  • Internet-based telephone services
  • Streaming television
  • Online gaming
  • Remote working
  • Business systems requiring a stable connection
A brief interruption may barely be noticed while browsing a website, but it can be far more disruptive during a live call or online meeting.

Use the Starlink App Before Choosing a Position

The Starlink app includes a tool designed to help identify possible obstructions before the dish is installed. Using the phone’s camera, the app scans the sky from the proposed installation position and highlights objects that could interfere with the service. For a meaningful result, the phone should be held as close as possible to the actual height and position at which the dish would be mounted. It is sensible to test several possible locations rather than accepting the first one that appears suitable. A position only a few metres away, or slightly higher, may provide a much clearer view. The app is a very useful starting point, although it does not decide whether a roof, wall, chimney or pole can safely support the installation.

Can a Starlink Dish Be Installed at Ground Level?

Starlink equipment can initially be tested at ground level using the supplied stand, provided it has a sufficiently clear view of the sky. This can be useful when setting up the equipment for the first time or comparing different positions. However, ground-level placement is not always suitable as a permanent arrangement. Potential problems include:
  • Trees, fences and buildings blocking part of the sky
  • The dish being knocked, moved or damaged
  • Children or animals interfering with the equipment
  • Lawnmowers and garden tools damaging the cable
  • Standing water or heavy plant growth around the dish
  • The cable being left exposed across a path or garden
Where a suitable clear position exists, a secure ground pole may provide a more permanent solution. The position and height still need to be checked carefully before installation.

Is the Roof Always the Best Location?

A roof is often considered because it can place the Starlink dish above nearby obstructions. In many cases this provides a much clearer view of the sky than a position at ground level. However, the highest possible point is not automatically the best one. A successful roof installation must also take account of:
  • Safe access for installation and future maintenance
  • The condition and construction of the roof
  • Exposure to strong winds
  • A secure and appropriate mounting method
  • Nearby chimneys, trees and neighbouring buildings
  • The route the cable will take into the property
  • Avoiding unnecessary damage to tiles or roofing materials
Starlink dish professionally installed above the roofline of a house
A roof installation can help give the Starlink dish a clearer view above surrounding obstructions.
Coastal properties and exposed rural buildings may require particular care because the mounting equipment can be subjected to stronger winds and harsher weather. Working on a roof is also dangerous without the correct equipment and experience. A permanent roof installation should not be attempted from a ladder or by leaning out of a window.

Wall and Eaves Installations

A wall or eaves mounting position can sometimes provide the best balance between a clear view of the sky and practical access. A properly selected wall position may:
  • Raise the dish above garden-level obstructions
  • Provide a shorter and tidier cable route
  • Make future access easier than a high roof installation
  • Avoid placing fixings directly through roof coverings
The dish must project far enough away from the building to prevent the roofline, guttering or wall from obstructing its view. The suitability of a wall installation will depend on the direction the property faces, its height, the surrounding buildings and the location of nearby trees.
Starlink dish securely mounted on the outside wall of a house
A wall-mounted installation can provide a secure position while keeping the dish clear of the roofline.

What About Chimney Mounting?

A chimney can provide an elevated position with a good view of the sky, but it must be assessed carefully before any equipment is attached. The condition of the brickwork, the type of chimney, wind exposure and the proposed fixing method all need consideration. A chimney should not be damaged by inappropriate drilling or excessive loading. It is also important to make sure that the dish will not be unnecessarily exposed to smoke, heat or future chimney maintenance.
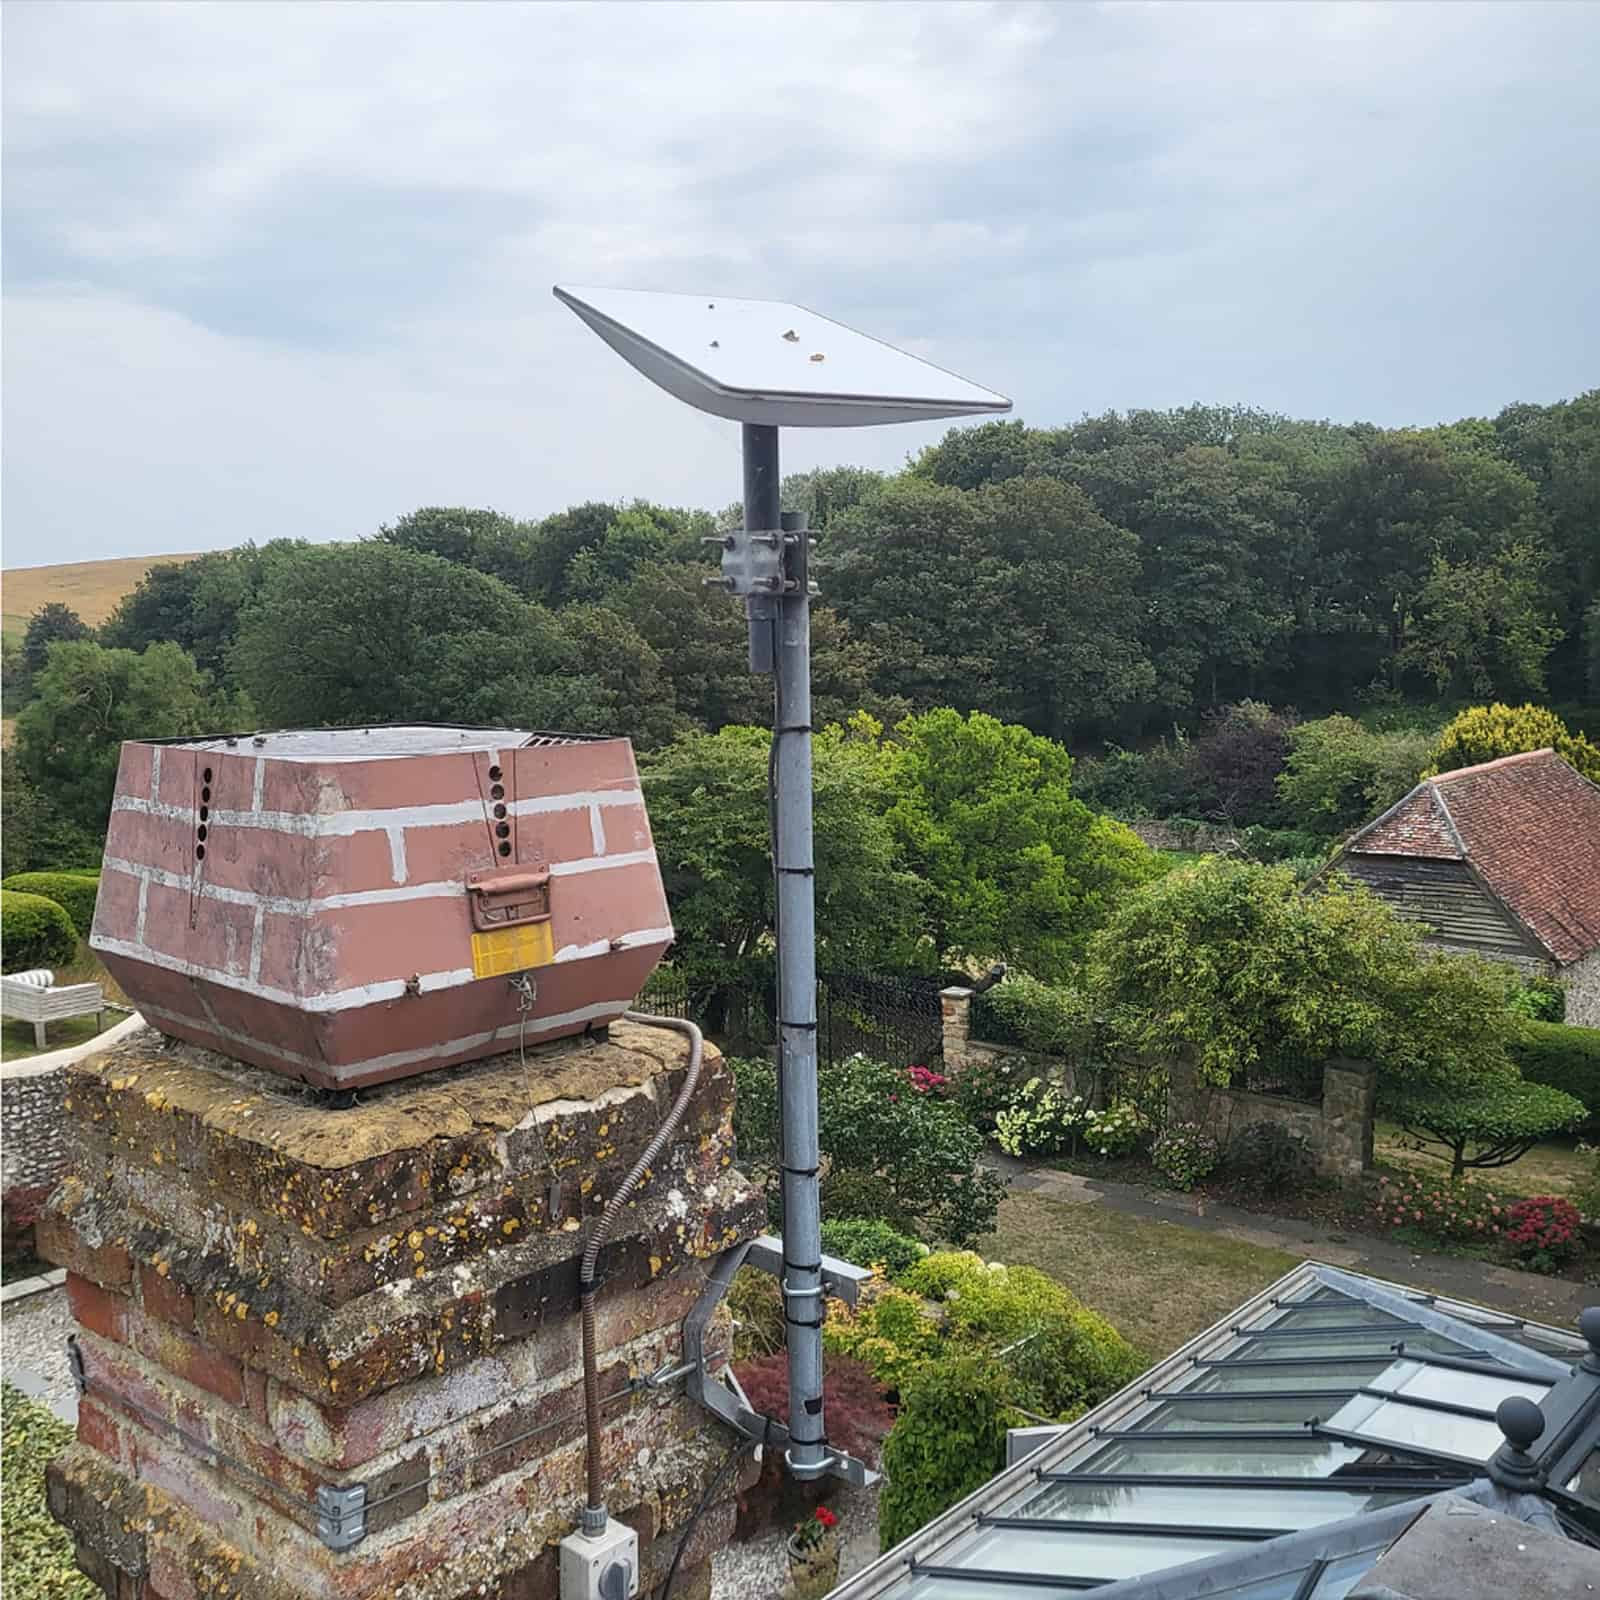
Starlink dish installed on a pole beside a chimney
An elevated pole installation can provide a clear position while keeping the mounting separate from the top of the chimney.

Trees Are a Common Starlink Obstruction

Trees are one of the most common reasons why an apparently sensible Starlink position proves unreliable. The problem may not always be obvious. A nearby tree might only cover a small section of the dish’s field of view, but branches moving in the wind can cause intermittent interruptions. Trees also change throughout the year, so a position that appears clear during winter may become partly obstructed once the leaves return. Before deciding that a tree needs to be cut back or removed, it is worth investigating whether the dish can be:
  • Moved to another part of the property
  • Installed higher on a suitable wall
  • Mounted securely on a roof
  • Raised using an appropriate pole
  • Positioned on an outbuilding with a clearer view
Relocating the dish is often a more practical solution than making major changes to the surrounding trees.

Think About the Cable Route

The dish position is only one part of the installation. The cable must also reach the Starlink router inside the property. A good cable route should be:
  • Protected from avoidable damage
  • Securely fixed
  • Kept as discreet as reasonably possible
  • Properly weatherproofed where it enters the building
  • Free from sharp bends, crushing or excessive strain
The shortest cable route is not always the best route. It may be preferable to use a slightly longer route if it protects the cable and avoids an awkward entry point. Care is also needed when passing the cable through walls because Starlink connectors and cables should not be cut, tightly bent or forced through an unsuitable opening.

The Best Dish Position May Not Give the Best Indoor Wi-Fi

A correctly positioned dish can provide a strong incoming Starlink connection, but that does not guarantee good Wi-Fi throughout the property. The Starlink router may need to be placed close to where the cable enters the building. In a large house, old property, converted barn or commercial building, this may leave distant rooms with a weak Wi-Fi signal. Thick walls, multiple floors and extensions can all reduce wireless coverage. A mesh Wi-Fi system, wired access points or Ethernet cabling may be needed to distribute the connection properly around the building. It is therefore worth planning the dish position, cable route and indoor network together rather than treating them as three separate jobs.

Can You Install Starlink Yourself?

A simple ground-level setup may be manageable for some householders, particularly when the property has a wide and unobstructed view of the sky. Professional assistance becomes more valuable when the installation involves:
  • Working on a roof or at height
  • Difficult or changing obstructions
  • Chimney, wall or pole mounting
  • Long or complicated cable routes
  • Weatherproof entry through an outside wall
  • Large properties with poor internal Wi-Fi
  • Connecting offices, outbuildings or holiday accommodation
  • Improving an unsuccessful temporary installation
Professional Starlink installation on a timber-clad building
Different buildings require different mounting solutions, depending on access, construction and the available view of the sky.
The objective is not simply to make Starlink work on the day it is unpacked. A good installation should remain secure, tidy and reliable over the longer term.

Professional Starlink Installation in Sussex

Local TV Aerials & Satellites provides professional Starlink installation for homes and businesses across East and West Sussex. We can help identify a suitable mounting position, securely install the equipment, route the cable into the property and assist with Wi-Fi and network coverage where required. For more information, visit our Starlink Installation Experts page or call 0800 802 1791 to discuss your property and installation requirements.

Local TV Aerials & Satellites is an independent installation company and is not affiliated with or endorsed by Starlink or SpaceX.

Book An Engineer

Frequently Asked Questions

How quickly can you attend my property?

In most cases we can offer a same-day or next-day visit, with a two-hour arrival window so you’re not waiting in all day. Emergency TV aerial and satellite faults are treated as a priority, and we’ll always be honest about the earliest slot we can realistically make.

We don’t charge just to talk to you. We’ll usually visit, test the signal and give you a free, no-obligation estimate before any work is done. If you’re happy with the price, we can normally complete the installation or repair during the same visit. You’ll always know the cost upfront.

We’re based in the South East and regularly work across East Sussex, West Sussex and surrounding areas, covering both towns and rural locations. If you’re unsure whether we cover your address, just give us your postcode and we’ll confirm.

We install and repair TV aerials, satellite dishes, Freeview and Freesat systems, as well as multi-room TV points, TV wall mounting, Starlink and satellite broadband, communal systems, CCTV, Wi-Fi alarms, network cabling and home/office networking. If it involves reception, cabling or connectivity, we can usually help.

Most modern aerials will cope with digital services like Freeview and Freely without issue, but older or damaged aerials can struggle after the digital switchover. We can test your existing aerial using professional meters and advise whether a repair or upgrade will give you the best long-term reliability.

Yes. Break-up or pixelation can be caused by a misaligned aerial, a damaged dish, water-damaged cables, worn connectors or issues with boosters and splitters. We test the signal at your aerial and at each TV point to identify the fault, and most reception problems can be fixed during the first visit.

We install roof-mounted aerials, loft aerials and specialist high-gain or log-periodic aerials. Roof aerials usually give the cleanest signal. Loft aerials are suitable where access or appearance is an issue, but they can be more sensitive to interference. We’ll recommend what gives you the most reliable reception in your specific location.

  • Freeview (and the newer Freely-style services) use a standard TV aerial.
  • Freesat and Sky use a satellite dish.
  • Subscription services offer more channels and on-demand content.
  • Streaming services (Netflix, iPlayer, Prime Video, etc.) are delivered through your broadband, not your aerial or dish.
  • We can help you set up whichever combination gives you the best choice and the most stable signal.

Yes. We can add extra aerial or satellite points in bedrooms, kitchens, loft conversions and offices, and we can design proper distribution systems so that every TV gets a strong, balanced signal without interference. For satellite and Starlink systems we can also route new cabling neatly and safely.

Yes. We install and mount Starlink systems, providing safe cable routing into the property, secure brackets or poles, and integration with your existing Wi-Fi and network hardware. Starlink is especially useful in rural areas where broadband speeds are low or unreliable.

Yes. We install CCTV, Wi-Fi alarms, Ethernet cabling, access points, network switches and 4G/5G router setups. This allows us to give you a complete, reliable setup for TV, internet and security systems using one team.

All engineers are fully trained, insured and DBS-checked. Our team works to industry standards, uses modern equipment and follows best practice for safety and reliability. You’re always dealing with professional, experienced installers.

Yes. We design and maintain communal aerial and satellite systems, as well as IRS systems and commercial TV networks for flats, hotels, pubs, offices, gyms and other multi-screen environments. We regularly work with landlords, property managers and building contractors.

All new installation work comes with at least a 12-month guarantee on parts and labour. Many components carry longer manufacturer warranties. If anything related to our work goes wrong during the guarantee period, we’ll return and put it right.

Your engineer will arrive within the agreed window, discuss the issue with you and check access. They’ll test the signal, inspect your existing equipment, explain the options and confirm the price before starting. Once the job is done, they’ll retest everything, show you it working, and tidy up. Old or unsafe equipment can be removed if needed.